
New Tutorial 2023
View All Tutorials

Android Tutorial:
Mipmap Example
Added March 2023
Mipmap Icons: Android Resources
For this tutorial, we are going to learn how to code mipmaps that can be used to hold the icon images for your app. Like res/drawable for images, mipmap folders can hold icon images of various densities which support the different device screen sizes in Android. Screen densities can range from 240dp for small cell phones to 1280dp for large tablets.
Including images for all screen densities is not necessary to build an app; however, they are necessary or recommended if you plan to market your app as 'available for different screen sizes - smartphones and tablets'. If you only plan to market your app as suitable for one device screen size like say a 'smartphone', then you only have to add the proper mipmap icon density size for a smartphone.
Since Android 4.3, api 18, we can now make use of the res/mipmap folders to store "mipmap" images - your app icons.
Mipmap does not keep any other images, just the app icon images. Non icon images are kept in your res/drawable folders. These can also be density specific.
To code the mipmap, in the 'AndroidManifest.xml', we use the @mipmap/ qualifier, instead of @drawable/ to add the icon default launcher name or you can also add a customized launcher, just add the name at the manifest icon property: - use '
android:icon="@mipmap/ic_launcher", or if customized use;
android:icon="@mipmap/put_customized_name_here".
Download Free Icons
For a customized icon you can use any icon, just name it as you like; use png or jpg as the image types. Browse "free android icons' websites to get some free icons you can use. They are usually organized by icon sizes for Android like 32x32, 48x48, and so on. Just select each size you want and then download each one.Popular download websites for android icons include:
Flaticon.com, Icons8.com, Iconspedia.com.
Choose the ones you want for the device sizes you are going to support in your app. Most of these free websites only require a courtesy link in exchange for the free icons.
If you don't add a customized icon then the Android system will use the default icon which is the little green android icon. This is the default launcher icon for android: ic_launcher.png. By default, it gets put into all the res/drawable density folders - res/drawable-hdpi/ic_launcher.png, res/drawable-xhdpi.png, and so on. Most developers who make apps create their own mipmap folders and put their own customized icons into those, which allows the developer to be creative with their launcher icons and also they can target the device sizes they want.
Create Mipmap Folder
When we create our 'template app' in AIDE, res/drawable folders hold the default app icon. These are created at the res/drawable folders by default. However, when adding your own icons, you should use the res/mipmap folders.Mipmap folders are not created for us; we must create them for each app we develop.
We create the mipmap folder name at the res/mipmap folder of our app project. If you want your app to support all screen size types, like smartphones and tablets, then you want to create mipmap folders for all the screen densities:
mipmap-ldpi
mipmap-mdpi
mipmap-hdpi
mipmap-xhdpi
mipmap-xxhdpi
mipmap-xxxhdpi
Goto res/ folder in your app project, then create a 'new folder' for each mipmap name as shown here. Then we simply add the icon images to each folder you might want to use.
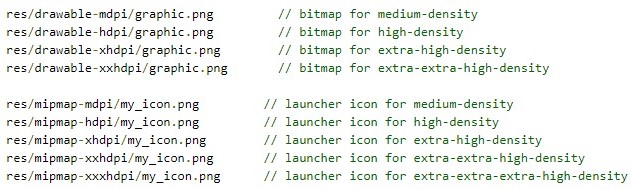
For our 'template android app', that we create in our tutorials with AIDE, (Android Studio for Desktop also uses templates), we have our icon launcher added for us at the res/drawable folder of our app project. In addition to res/drawable there is also a res/drawable-hdpi, res/drawable-mdpi, res/drawable-xhdpi, and res/drawable-xxhdpi.
If you look at these additional res/drawable folders, you'll see the ic_launcher name is the same in all the folders. Although the name is the same for each, the actual icons are all different sizes. These different sizes represent different 'android device' screen sizes. Depending on the android device screen size; the Android system automatically launches the app icon most suited to that device. This image shows the icon sizes by mipmap folder.

Screen Size, Screen Density, Screen Resolution
To better understand 'mipmaps', and how to implement them, it's good to read about screen sizes, screen density, and screen resolution. Knowing all of them makes learning 'mipmaps' easier.Screen Size
For screen size, the screen is measured at the diagonal of the screen. For simplicity, Android groups all actual screen sizes into four generalized sizes: small, normal, large, and extra-large.This image shows typical Android devices by screen sizes and dp.

SCREEN DENSITY
Screen density is the amount of pixels contained in a physical area of the screen; known as dpi - dots per inch. 'Low' density screens have fewer pixels per a contained physical area than a 'medium' density screen, and a 'medium density' screen has fewer pixels per physical area than a 'high' density' screen. The greater the density, the more pixels per physical area in the screen. Given this, it would make sense that a higher density screen would require a larger image to display properly.Android screen densities are grouped into six categories; low, medium, high, extra-high, extra-extra-high, and extra-extra-extra-high density.
SCREEN RESOLUTION
Screen resolution is the total number of pixels on a device screen. For developers, screen resolution is not required for factoring images, however, screen size and screen density are, and should be taken into consideration when adding image resources.Android Developer
From android developer, quoted: 'Different home screen launcher apps on different devices show app launcher icons at various resolutions. When app resource optimization techniques remove resources for unused screen densities, launcher icons can wind up looking fuzzy because the launcher app has to upscale a lower-resolution icon for display. To avoid these display issues, apps should use the mipmap/ resource folders for launcher icons. The Android system preserves these resources regardless of density stripping, and ensures that launcher apps can pick icons with the best resolution for display'.By following best practices for adding icon images; 'you can create an application that displays properly and provides an optimized user experience on all supported screen configurations, using a single .apk file.'
Android Studio
Android Studio for desktops, is similar for mipmaps, in that added images are auto added to the proper folders. For launcher icons; they are put in the mipmap folder; all other images goto drawable folder.Creating Our New App
We are going to create a new app for this tutorial, and name is - Mipmap Android Tutorial,

Open AIDE, Select New Project, from the left menu, or center menu hierachy of files; and do the following:
Select

choose NEW ANDROID APP(Gradle/Android SDK/java/xml) if your using the newest version of AIDE.
Choose HELLO WORLD example app template(java/xml);if your using an older version of AIDE,
For app name; type 'Mipmap Android Tutorial'
For app package name type: com.aac.mipmapexample
Click Create
Your new app is now created for you - named 'Mipmap Android Tutorial'. For now, you will have the 'little green Android image' as your app icon.
This app has a customized app icon; an icon image is added to each of the mipmap density folders; you can download the 6 mipmap icons at the Example Code section.
Once you add your apps' icon image and run your app with the updated and any new pages you create; you'll see the customized 'App Icon' instead of little green Android icon.
Note: Not all tutorials have a customized icon or require new pages to be created.
AIDE automatically opens your new app in the editor for you.
Where Code is Coded
Creating a Mipmap and Adding Images
At strings.xml, add the string as shown at the Example Code section on this page - Just copy and paste to replace what's on the page now. Also, For this app we require editing our 'AndroidManifest.xml', to change the android:icon name from @drawable/ to @mipmap/, .and, to create our mipmap folders at the res/ of our app project; and add our icon images to it. All the icon images are at the Example Code section, just save each to your device.

At res/ create each of these folders as named:
res/mipmap-ldpi/mipmap_32.png
res/mipmap-mdpi/mipmap_48.png
res/mipmap-hdpi/mipmap_72.png
res/mipmap-xhdpi/mipmap_96.png
res/mipmap-xxhdpi/mipmap_144.png
res/mipmap-xxxhdpi/mipmap_192.png
Next, we must add the icon 'images' to these folders. Add the 32x32 sized icon into the mipmap-ldpi folder, 48x48 in the mipmap-mdpi, 72x72 in the mipmap-hdpi, 96x96 in the mipmap-xhdpi, 144x144 the mipamp-xxhdpi folder, and 192x192 the mipmap-xxxhdpi folder.

Once you add each image to its' mipmap folder in your app project; simply rename all the images to mipmap_icon. You can rename them in AIDE, just click and press each image name, a popup appears, just choose RENAME; type the new name: 'mipmap_icon', select OK. If preferred, you can use your device FileManager, to rename each image. Just goto each folder and use the rename feature in your device FileManager.

All mipmaps being used as the app icon must have the same name even though they are different sizes. That way, when we add the mipmap icon name to our manifest page, the android system can easily find the mipmap density it needs for a particular device screen size.
You can download these images at the Example code section; name them as specified; then upload them into your app project using the FileManager on your device. If your using Android Studio, just save them to your desktop, and upload them into Android Studio assets.
Because they all have the same name, we do not have to change our code or add code to reflect the mipmap folders. And, the Android system knows to use whatever mipmap icon is best suited to the screen size and density of the device.
Mipmaps, Bitmaps, Drawables and Vectors
Bitmaps are images you use in your android apps like jpg, png or gif. Bitmaps can be added in xml code and can also be added programmatically. When coding images programmatically, you often use the Bitmap code class as it can refer to any type of images resource that Android supports.Mipmaps, as you have read in this tutorial, are suited to app icons and gaming apps where scaled smaller images of the original are preferred because they can reduce rendering times and access images more efficiency for game play. Also in gaming, mipmaps are great for designing different aspects of game play especially for proximity of images in games.
Most non icon images are put in the drawable folder at res/ for app projects. Images that are mostly stationary and for the app UI are usually put in the drawable image folder. Like mipmap, the drawable folder also support different densities, and is added by using the same qualifier designations: res/drawable-ldpi, res/drawable-mdpi, res/drawable-hdpi, and so on.
With Android, you can also create gradient drawables, shape drawables, and animations; which are also added to the '@drawable' folder for images. Certain types of animations have their own specific folders. You learned how to code animations, gradient drawables, and shape drawables in our android tutorials.
If you only have one drawable image defined, be it for your app icon or an image for your app UI, the Android system uses that image for all device screen sizes it encounters.
It does this by scaling the image to whatever screen size it requires; be it a smaller screen size or a larger screen size.
Example: If you add only one image at drawable-hdpi(typically a average phone screen size), it probably shows fine on that display. However, if a user with a 10 tablet installs your app, the image you used is not likely to display as good as it does on the smaller phone screen.
To prevent this you can add additional larger images to the drawable-xxhdpi, and drawable-xxxhpi folders, or you can state in your app profile (at app store or your website- wherever user is downloading your app from) that your app is intended for smartphones only.
Generally speaking, for a lower density like mdpi you use one size image, and for a higher density like hdpi, you would create a larger size image; so for mdpi 100x100 image size, for hdpi a 150x150 image size. Then simply put them in their designated folders for drawable- or mipmap.
Android also supports no scaling of images. You might have a image for whatever reason you do not want Android system to scale it. So for this you create a folder named: nodpi.
You can create this folder at res/drawable-nodpi, and add your image res/drawable-nodpi/icon.png. Because you added this qualifier to your 'drawable' folder the Android system will not scale this image, regardless of the device screen size or density.
Vectors are also included as a resource type for Android images. They are best suited to use as icons and smaller sized graphics as these tend to work best with the Android platform. Like most android supported image types, vectors can be added to xml layouts, and programmtically to java class.
Vectors are unique in that they can be scaled to the various density sizes without sacrificing image quality. And because their colors tend to be richer compared to jpg and png images, developers often choose them for their app icon.
You can create vectors(svg) yourself by using tools in Android Studio as well as websites offering svg creation. Additionally, you can download these svg type images from online websites offering free images for free download. Vector images are often downloaded as eps type images. With these, you can convert to the svg format as required for Android. Online websites that 'convert images for free' like Convertio , will convert the vector eps to a vector svg.
Popular websites that offer free images for download including the svg type are:
Pixabay.com, Pexels.com, and Freepik.com.
A courtesy link is usually required for acquiring the free images.
Example Code
All code for this tutorial is at the Example Code section on this page. Only copy and replace code for the pages mentioned that require updating.At Example Code section on this page; any page notated as 'no edit required', means you dont have to copy and paste that page - added only for you to view.
From Android Developer, Additional Reading
Android Screen Sizes and Densities
Bitmaps - Classes and Methods
From Unity Website - Gaming
Introduction To Mipmaps
TIPS
Navigating The App Project Hierachy
To view A FILE do either: from right menu choose FILES or GOTO, this will show the apps files along the top of editor, dropdown, and left side menu. After editing a file, SAVE it, right side menu, choose SAVE.Creating Pages
Check for the filename extensions of page your creating. If for example, your creating a new Java page, (java folder)you want to see pages already created in that folder that have the .java file extension. Click 'create new java class' to create your page.
For xml files, you must create these in the 'res/layout' folder of your app project. Click 'add new xml file', to create your page.
In Summary,
App Name is 'MipMaps Android Tutorial' - located at AppProjects/ in AIDE; OPEN the AIDE app, then open App Projects, THEN select the 'Mipmap Android Tutorial', app from your files hierachy(left menu); then DOUBLE CLICK on any file from the app, like strings.xml, to open it in AIDE.
Make sure at top of page, the app name 'MipmapAndroidTutorial' is there next to AppProjects like so: AppProjects/MipmapAndroidTutorial, then you know you have the proper App.
Once a file is in the editor, you can edit, save it, then RUN your APP, install, to Open your app.
You can open the app Simply by Clicking on the Android little green App Icon,with the wording 'MipmapAndroidTutorial' on your tablet. It will be with your other installed apps.
If you make further changes to this App, you need to SAVE, RUN, UPDATE, INSTALL, OPEN the app again.
EXAMPLE CODE - Code For This Tutorial.
JUST copy the code for this tutorial from the Example Code in this section.

JUST copy the code for this tutorial from the Example Code in this section.
This free script provided by
JavaScript
Kit
AIDE for creating Android Apps on your tablet or cell phone(android).
Free and Paid.
GoTo Aide
ANDROID STUDIO - for creating Android Apps on your desktop computer.
Free to Install and Use
Learn more - Android Studio
The Java XML files we code(example codes) and the Android Apps we create in our Free Tutorials are compatible with Android Studio and AIDE. Just choose Java XML as your Programming Language.
You May Like:
Golf with Lefties - Golf Instruction Tips & Videos Taste World Wines Flavours and Aromas
Android Tutorial: Mipmap Android Tutorial
AndroidAppCoding.com, All Rights Reserved