Libgdx with Android For Game Dev
Game Dev Tutorial : Move Mouse From Bottom to Top of Game Screen: Keep Mouse Inbound
Game Dev -All Game Dev Tutorials
For this tutorial, we are going to add a pixelart mouse character to the game screen, and have it move from bottom of game screen to the top of the game screen. To facilitate the mouse action, we will use the 'Input' property, and the 'Rectangle' property. The Input connects the tap event, and the Rectangle can determine if the tap has occured on the mouse. If it has, then the mouse will move by a fixed distance that we can set as we want.
Using these code properties and their attributes gives us a simple way to move a game character around the game screen. Another consideration is the mouse character going out of bounds, basically disappearing off the screen as it travels. To remedy this, we can add code that will keep our mouse inbound as it travels to the top of the game screen. So, instead of going out of screen view, the mouse will move along the edge of the screen until it reaches its destination. When the mouse is tapped, it moves a fixed distance, then it stops. We tap it again, and it moves another fixed distance. It will continue in this manner until it reaches the top of the game screen. You can view the mouse action at the App Shot video shown on this page.
All code for this tutorial is at the Example Code section on this page. At App Shot, you can see the video of the mouse character with tap action, and for this tutorial, you can also download and install the app. Tested on a Android smartphone, screen size 5.8", and a tablet screen size 8"; both for vertical orientation.
FYI: The code from this game dev tutorial is compatible with Android Studio with the Libgdx component. Read more about Android Studio and Libgdx Here
Click Create; Tap Mouse - Move Mouse game app is created, and the MyGdxGame.java page opens in your AIDE coding editor.
For more info on navigating files and using the AIDE coding editor, goto Tutorial 1.
App Shot - Portrait 5.8" Game Screen
Tap Mouse, Move Mouse
Download/Install This App: Here

Imports and Game Class
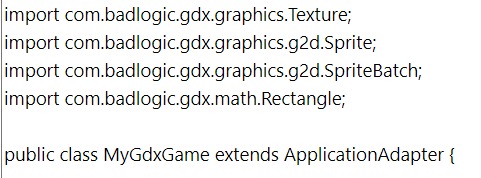
At imports, we include the standard imports and any additional ones we require for this code. So, we include, Rectangle, Texture, Sprite, as shown in this image.
Variables At variables we include the class members and then our named variables for theme. So, for this tutorial, we include: Texture and name the variable for it as mouseTexture, Sprite and name the variable for it as mouse; the float variables for mouseX, and mouseY -variables we require for our mouse movement, and the float variable for mouse distance - moveDistance, and set the distance you want the mouse to travel per tap -80.0f. These are all declared here at class members, then we can use them in our code functions, by using the variable names we assigned to them. You can name the variables as you want.
Next, after imports, we declare the class we are going to use; so, here we use ApplicationAdapter,and we code it with; public class MyGdxGame extends ApplicationAdapter {. You must declare a class for your code, as it contains all the core components required to make all your code execute together.

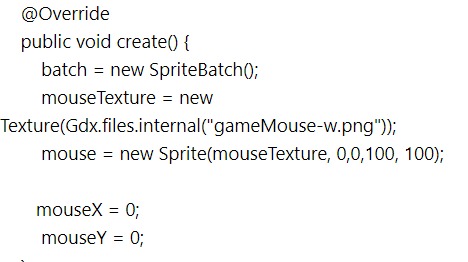
Create - At create method, we include the new instances of all the class members we are coding for this tutorial, and those are: Spritebatch, Texture, Sprite, and Mouse X, and Mouse Y.
To create them, we use the code as shown in this next image. Texture to load our game pixelart mouse character, and Sprite, because we are going to declare our loaded pixelart mouse as a Sprite. MouseX, and mouseY, must be created here, so we can add our input action to them. We also set their starting position as 0.0, which is the left bottom corner of the game screen. 0.0 means x and y are at 0.0, x for width on the game screen, and y for height on the game screen.
Render - At render method, we first clear the game screen, and then set our new screen color, which for this game screen, we use 1,1,1,1, for color white. If we are including more than one game screen, we also can set individual colors for each game screen, or have them all the same color, Either or, all game screen colors are set in the Render method. For multiple game screen colors, we can easily implement the 'switch' case function, to show the correct screen color for the game screen we are currently displaying. We learned how to add color to various game screens in our previous tutorial, Game Screen Styles,Color.
Render method, is where we draw our game graphics to the screen. So this would include images, fonts, game characters, and the like. If we using Stage, we can draw them to stage with the 'stage.draw()' code call, otherwise, we can draw them with batch. Because we are not using a Stage in this tutorial, we will draw our mouse to screen with 'batch.draw' function.
First, at Render method, we code for the tap event with this 'Gdx.input.justTouched' event code.

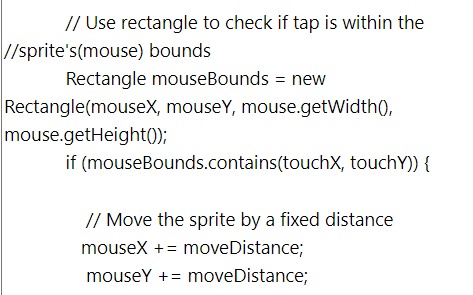
Then, we include code for the Rectangle function, this detects if the tap is within the mouse parameter we have set. And, we include the moveDistance code to that when the mouse is tapped, the mouse will move by the fixed distance we have set.
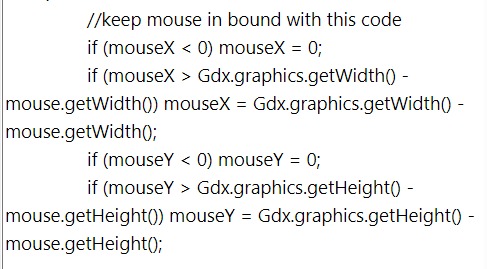
We also include this next code - 'if' logic; to keep the mouse game character inbound as it moves towards the top of the game screen. If we don't include it, the mouse goes out of bounds and disappears off the game screen. So numeric 0 means it is in the game screen parameters, but < 0, (less than 0), means out of bounds or not on the game screen; and the logic - mouseX=0, means to keep the mouse inbound for width, and mouseY=0, means to keep the mouse inbound for height. So, with this code we are saying: 'if the mouse wants to venture off the game screen, < 0; keep it in play screen with this; mouseX=0;, and with, mouseY=0.
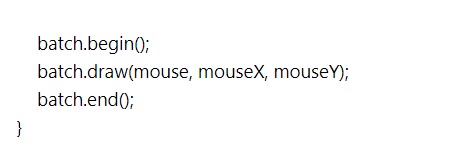
And, with this next image of the code, we draw our game mouse to the game screen; and with; 'mouseX', 'mouseY' values set; basically for the width and height parameters for the travel of the mouse. We use the variable name we gave to our Sprite - mouse, when we draw it to the game screen.
Note, that because we are not using a Stage, we can use batch.draw(mouse,mouseX,mouseY), instead of the stage code call which is; stage.draw(). Using Stage can make coding much easier, and, as we have learned in previous tutorials, it is also easier to action your game characters and assets with Stage. However, like all things in game dev, it is based on the type and complexity of the game you want to make.
Dispose - At dispose method, we get to dispose of all our game assets, to keep our game performance at its' best. If using Stage, we can dispose of all assets at once, with 'Stage.dispose();' code call, otherwise we can dispose of each variable directly, as shown in this next image. We named our Texture - mouseTexture, so that is the name we must include here to dispose of it.

This tutorial presented a simple way to add a an input property and rectangle property to the game character making it actionable on the game screen, while making it fun and intuitive.
As we have learned in previous tutorials, there are other ways we can incorporate user taps on the game characters, including text buttons and image buttons, both with click listeners. But with inputs we can add a different perspective on actioning the game character. By utilizing both the input property, and text and image buttons, we can create a complex and fun user interface for game play.
Game Dev -All Game Dev Tutorials
App Project Name: Tap Mouse - Move Mouse
For this tutorial, we are going to add a pixelart mouse character to the game screen, and have it move from bottom of game screen to the top of the game screen. To facilitate the mouse action, we will use the 'Input' property, and the 'Rectangle' property. The Input connects the tap event, and the Rectangle can determine if the tap has occured on the mouse. If it has, then the mouse will move by a fixed distance that we can set as we want.
Using these code properties and their attributes gives us a simple way to move a game character around the game screen. Another consideration is the mouse character going out of bounds, basically disappearing off the screen as it travels. To remedy this, we can add code that will keep our mouse inbound as it travels to the top of the game screen. So, instead of going out of screen view, the mouse will move along the edge of the screen until it reaches its destination. When the mouse is tapped, it moves a fixed distance, then it stops. We tap it again, and it moves another fixed distance. It will continue in this manner until it reaches the top of the game screen. You can view the mouse action at the App Shot video shown on this page.
All code for this tutorial is at the Example Code section on this page. At App Shot, you can see the video of the mouse character with tap action, and for this tutorial, you can also download and install the app. Tested on a Android smartphone, screen size 5.8", and a tablet screen size 8"; both for vertical orientation.
FYI: The code from this game dev tutorial is compatible with Android Studio with the Libgdx component. Read more about Android Studio and Libgdx Here
Create our Game App Screen
We are creating a new app for this tutorial. First, we must create our new mobile game app, so in AIDE, at the AppProject file hierachy, Choose Create New Project, select Mobile Game, and New Mobile Game; then add the App name, Tap Mouse: Move Mouse(Note: no spaces in the app name(can use _ ), or you can add spaces after you create it; Just Goto: the 'AppProject' folder; just select the App Name, and then select rename). Next, add the package name, 'com.aac.tap_move_character'.Click Create; Tap Mouse - Move Mouse game app is created, and the MyGdxGame.java page opens in your AIDE coding editor.
For more info on navigating files and using the AIDE coding editor, goto Tutorial 1.
App Shot - Portrait 5.8" Game Screen
Tap Mouse, Move Mouse
Code For This Tutorial
For this tutorial, we must include the imports, game class, class members(with variables), create method, render method, dispose method. And, include any additional classes and methods we require for this tutorial.Imports and Game Class
At imports, we include the standard imports and any additional ones we require for this code. So, we include, Rectangle, Texture, Sprite, as shown in this image.
Variables At variables we include the class members and then our named variables for theme. So, for this tutorial, we include: Texture and name the variable for it as mouseTexture, Sprite and name the variable for it as mouse; the float variables for mouseX, and mouseY -variables we require for our mouse movement, and the float variable for mouse distance - moveDistance, and set the distance you want the mouse to travel per tap -80.0f. These are all declared here at class members, then we can use them in our code functions, by using the variable names we assigned to them. You can name the variables as you want.
Next, after imports, we declare the class we are going to use; so, here we use ApplicationAdapter,and we code it with; public class MyGdxGame extends ApplicationAdapter {. You must declare a class for your code, as it contains all the core components required to make all your code execute together.
Create - At create method, we include the new instances of all the class members we are coding for this tutorial, and those are: Spritebatch, Texture, Sprite, and Mouse X, and Mouse Y.
To create them, we use the code as shown in this next image. Texture to load our game pixelart mouse character, and Sprite, because we are going to declare our loaded pixelart mouse as a Sprite. MouseX, and mouseY, must be created here, so we can add our input action to them. We also set their starting position as 0.0, which is the left bottom corner of the game screen. 0.0 means x and y are at 0.0, x for width on the game screen, and y for height on the game screen.
Render - At render method, we first clear the game screen, and then set our new screen color, which for this game screen, we use 1,1,1,1, for color white. If we are including more than one game screen, we also can set individual colors for each game screen, or have them all the same color, Either or, all game screen colors are set in the Render method. For multiple game screen colors, we can easily implement the 'switch' case function, to show the correct screen color for the game screen we are currently displaying. We learned how to add color to various game screens in our previous tutorial, Game Screen Styles,Color.
Render method, is where we draw our game graphics to the screen. So this would include images, fonts, game characters, and the like. If we using Stage, we can draw them to stage with the 'stage.draw()' code call, otherwise, we can draw them with batch. Because we are not using a Stage in this tutorial, we will draw our mouse to screen with 'batch.draw' function.
First, at Render method, we code for the tap event with this 'Gdx.input.justTouched' event code.
Then, we include code for the Rectangle function, this detects if the tap is within the mouse parameter we have set. And, we include the moveDistance code to that when the mouse is tapped, the mouse will move by the fixed distance we have set.
We also include this next code - 'if' logic; to keep the mouse game character inbound as it moves towards the top of the game screen. If we don't include it, the mouse goes out of bounds and disappears off the game screen. So numeric 0 means it is in the game screen parameters, but < 0, (less than 0), means out of bounds or not on the game screen; and the logic - mouseX=0, means to keep the mouse inbound for width, and mouseY=0, means to keep the mouse inbound for height. So, with this code we are saying: 'if the mouse wants to venture off the game screen, < 0; keep it in play screen with this; mouseX=0;, and with, mouseY=0.
And, with this next image of the code, we draw our game mouse to the game screen; and with; 'mouseX', 'mouseY' values set; basically for the width and height parameters for the travel of the mouse. We use the variable name we gave to our Sprite - mouse, when we draw it to the game screen.
Note, that because we are not using a Stage, we can use batch.draw(mouse,mouseX,mouseY), instead of the stage code call which is; stage.draw(). Using Stage can make coding much easier, and, as we have learned in previous tutorials, it is also easier to action your game characters and assets with Stage. However, like all things in game dev, it is based on the type and complexity of the game you want to make.
Dispose - At dispose method, we get to dispose of all our game assets, to keep our game performance at its' best. If using Stage, we can dispose of all assets at once, with 'Stage.dispose();' code call, otherwise we can dispose of each variable directly, as shown in this next image. We named our Texture - mouseTexture, so that is the name we must include here to dispose of it.
Summary
When creating your mobile games, you most likely will implement some type of input strategy to actionize the game characters and also fixed game assets. This is very common in game dev, as it allows game users to interact with your game's interface providing the best game user experience.This tutorial presented a simple way to add a an input property and rectangle property to the game character making it actionable on the game screen, while making it fun and intuitive.
As we have learned in previous tutorials, there are other ways we can incorporate user taps on the game characters, including text buttons and image buttons, both with click listeners. But with inputs we can add a different perspective on actioning the game character. By utilizing both the input property, and text and image buttons, we can create a complex and fun user interface for game play.
EXAMPLE CODE - Code For This Tutorial.
JUST copy and paste to update your code.
JUST copy and paste to update your code.