
How To Code an Android Style
Prev Tutorial | View All Tutorials
Android - Coding a Theme
If you are just arriving at this page; and you are not familiar with creating Android Apps, we suggest you begin with our tutorials: Coding Android App Pages and How To Create a Simple App in Android
From there follow along with each tutorial lesson including this android tutorial - coding a theme.
Theme.Holo.Light
For this tutorial, we are going to add the 'theme.holo.light' as our app theme.
Our app name will be: Android Themes Styles, as we will also use this app we create for our next tutorial - coding 'styles for a textview'.
This name will be shown at the top of the screen view next to the App Icon. The app icon is a system generated icon,
usually named ic_launcher.png; and, it is a little green android. This icon app can be changed to whatever you like. To do so; just put the image in the res/drawable-hdpi
folder of your app project; and define it in the AndroidManifest.xml file at the line: android:icon="@drawable/ic_launcher
COPY/PASTE CODE
First, create a java/xml android template app using AIDE, (or Android Studio). Then you can get the code for this app from the EXAMPLE CODE section on this page.
Replace the code on the pages you need to(with our tutorial code); in order to create this app.
Sometimes, new pages have to be created.
All the other coded pages in your app
can remain as they are; they don't need to be changed.
Create Your Android Template Java/xml App
When creating your app,(from left menu) choose:Create New Project;
Then, choose
New Android App(gradle, android Java/xml)
or
Hello World App Java/xml
if your using the original version of AIDE
For app name; type AndroidThemesStyles
Then, next line for the package name type: com.acw.themes
Click Create
Now your new app has been created with the name 'AndroidThemeStyles'. This name will show on the left menu hierachy within AIDE.
To open your
app just click on the name:AppProjects/AndroidThemesStyles then browse to; the app androidmanifest.xml file; double click to open it. This file now shows in the
AIDE coding editor. You can replace the code thats there with our tutorial code for this page; just copy and paste, then save the file.
To view all the apps files do either: from right menu choose FILES or GOTO, this will show the apps files along the top of editor, dropdown, and
side menu. Just double click a file to open it in the coding editor.
Now we can edit our app code to include the 'holo theme light'.
Styling Themes
Android has many system predefined themes and individual styling properties you can use to style your views, acitivities, or an entire application.For styles -
To use them, you need to code the style property and the attribute/value for each- example font(property) - size(attribute) - small(value).
You can define individual style properties in the element your coding; like a textview; or you can make a custom style that can include a few or many style attributes; a name is given to the customized styles you make; and you just need to code your 'customized name' to use the selection of style properties you created.
For example: you could code
font color, size, appearance, and name it 'myfonts'. Then when you want to use those fonts in a view; you only need to code 'myfonts', you don't need to code a line for each
individual style each time.
And, if you wanted to include the same style or theme across many views or some of the activities within your app, then customizing your styles is good coding practice.
style.xml
To add a customized style or theme to your app; you need to create a style.xml file in the resources/value of your app project.For themes - if you want your entire app to have the same styling look; then you can use a style 'theme'. Like 'styles', you can create your own customized 'themes', or use one of the many android predefined themes.
A theme is coded a bit different than a style; although you do need to make a style.xml file for either of them. With the 'theme' you also need to code your theme name(predefined theme name or customized name you created) into your androidmanifest.xml fle.
Coding The Theme: With - Without a Title Bar
For this app, we will code a 'holo.theme.light' theme to our android app. Also, we will code it with and without a title bar.
Depending on what type of app your creating you may not want a title bar; so you can code either one.
What the App with a 'Theme.Holo.Light', will look like:
with a 'Title Bar'
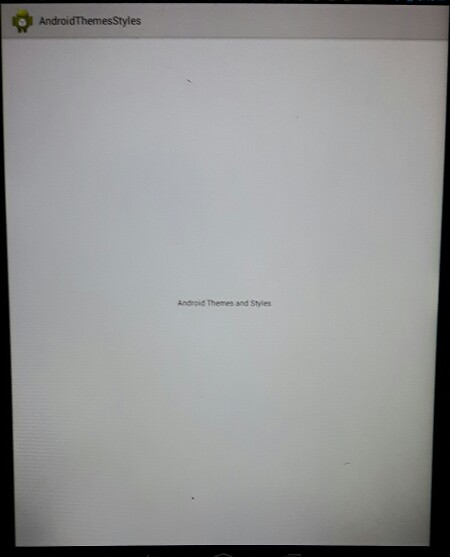
What the App with a 'Theme.Holo.Light', will look like:
without a 'Title Bar'

Once you add the code, your app should look similar to these photos of the theme.
The code: Theme.Holo.Light - Title Bar
style.xml

The code: Theme.Holo.Light - No Title Bar
style.xml

How To Create style.xml
To create your style.xml file, do the following.Click on the little orange folder at top of files hierachy;(the one just above the text that says:'add new xml file here'), this take you to previous folders till you get to AppProjects, Once at AppProjects, all apps you created are shown, just click on AndroidThemesStyles.
GoTo AndroidThemesStyles/res/values

(Look at top menu as shown in this image, make sure you see AndroidThemesStyles/res/values there)
First we create your style.xml page, click on 'add new xml file here'(as shown in this image), type the name 'style.xml' and create file. The file is created for you.
Looking at this image; you see the style.xml file and the strings.xml file. Make sure at top of editor: you see 'AndroidThemesStyles' app; before creating your file
And, make sure your at AndroidThemesStyles/res/values folder.
Now, we add the code to the style.xml file. To do so. just copy and paste, the code from our EXAMPLE CODE on this page.
An image showing the code: theme.holo.light, with title bar. We need to add this code to the style.xml file, then save the page.
style.xml
Just delete the code that is in the style.xml page, and replace it with the code, from our EXAMPLE CODE.
We provided the code for a Theme.Holo.Light with a title bar, Once you add the code, SAVE the page, from right menu dropdowns.
Next, we must add the code to the androidmanifest.xml file to the Application Element as shown in this image.

IF we don't add the code to the manifest file: "android:theme="@style/mytheme", the android system won't know
that we want to add this theme.
Get the code from the EXAMPLE CODE on this page.
Next, we must change our strings.xml file: we want to add the text - Android Themes Styles, to our string named themes. To do so, just
delete the string name, hello, and type, themes; then add the text - Android Themes and Styles, save the file.
Get the code to copy paste from the EXAMPLE CODE on this page.
Run The App - Update our Changes
We have completed our updates to our new app;We have created our style.xml page, and added our theme code to it, and we added our theme name to our androidmanifest.xml fle. And we saved both files after
we coded them. We also added some text to our strings.xml file.
Now we can run the app to see our newly added theme and text.
From the right menu dropdown, choose, RUN, (the app is compiled and built), then choose
INSTALL when prompted, then just OPEN the app. Since we did not add a custom app icon, the app has the little green android icon, and next to that it says:
AndroidThemesStyles. You can find this app amongst all apps on your tablet, just look for the name: AndroidThemesStyles
Coding Tips
Theme.Holo.Light was added to Android version 3. API Level 11.When coding an android theme into your app; you must make sure it is compatible with your version and API Level of android.
To find out what these are do the following:
on your android tablet (or cell); goto settings, then look for 'about android', or 'about this device", clicking
that will give you the version of android your device in running on. Example; mine is android version 4.0. Then to see what your api level is
goto this link and look for your android version: and the 'api level' is shown with it.
Now i know i can add 'themes' and 'styles' that are compatible with the android api 14. If you add a theme that is not compatible with your api, the system will
just use the default theme.
If you want to add a 'theme' from an API Level, that is greater than yours, you need to add 'support libraries', to your app's build file, so that when you complile and run your app, the system can find them and include them in your app.
For example, the 'material theme', was introduced in android 5, API Level 21. If i wanted to add the material theme to my app i would need to add the support libraries for 'Material Theme', since i only have support for API Level 14. This will be a topic for another tutorial.
Additional reading: Code Examples, and available attributes for the 'Themes; and 'Style Attributes', at Android Developer Website: Coding Android Themes and Styles, View here
JUST copy the code for this tutorial App Name is 'Android Themes Styles' - located at AppProjects/Android Themes Styles in AIDE, open the AIDE app, then open App Projects, THEN select the 'AndroidThemesStyles', app from your files hierachy(left menu); then click on any file from the app, like strings.xml Make sure at top of page, the app name 'AndroidThemesStyles' is there next to AppProjects like so: AppProjects/AndroidThemesStyles, then you know you have the proper App.
Once a file is in the editor, you can edit, save it, then RUN your APP, install,
Open your app.
Make sure you SAVED EACH PAGE, before you RUN your code. SAVE, RUN, INSTALL, OPEN, your AndroidThemesStyles App. Once it has been
installed on your tablet, you can open it Simply by Clicking on the Android little green App Icon,with the wording 'AndroidThemesStyles' on your tablet. It will
be with your other installed apps.
If you make further changes to this App, you need to SAVE, RUN, UPDATE, INSTALL, OPEN the app.
This free script provided by
JavaScript
Kit
AIDE for creating Android Apps on your tablet or cell phone(android).
Free and Paid.
GoTo Aide
ANDROID STUDIO - for creating Android Apps on your desktop computer.
Free to Install and Use
Learn more - Android Studio
The Java XML files we code(example codes) and the Android Apps we create in our Free Tutorials are compatible with Android Studio and AIDE. Just choose Java XML as your Programming Language.
You May Like:
Make Sushi Rolls Taste World Wines Flavours and Aromas