
How To Add Android Themes To Your App
Prev Tutorial
View All Tutorials
If you are just arriving at this page; you can gohere to first - Create your simple Android app
Once you create your App you can follow along with each android coding tutorial.
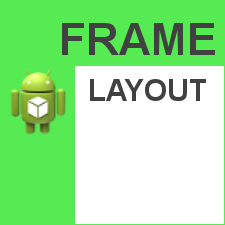
FRAME LAYOUT
For this android tutorial we create a java/xml android template app using AIDE, (or Android Studio). Then you can get the code for this app from the EXAMPLE CODE section on this page. Replace the code on the pages you need to(with our tutorial code); in order to create this app.Sometimes, new pages have to be created.
All the other coded pages in your app can remain as they are; they don't need to be changed.
Create Your Android Template Java/xml App
When creating your app,(from left menu) choose:Create New Project;
Then, choose
New Android App(gradle, android Java/xml)
or
Hello World App Java/xml
if your using the original version of AIDE
Name the app as shown here, use -
Frame Tutorial for the App Name and,
for the package name(next line) use:
com.acw.frame;
What the App 'Frame Tutorial' screen display will Look Like:
Once you add the code and images, your app should look similar to this one.
THE CODE FOR THE FRAME LAYOUT VIEW
To add a frame layout view to your android app you need to add the frame layout coding as shown in this image.
It is coded in the main.xml file commonly referred to as the layout file.

THE CODE FOR THE TEXTVIEWs
For this frame layout example app we added several textviews ,so you can see how they are placed within the view. We named each textview with text as: frame1, frame2, frame3, frame4, frame6. Although we didn't add text, the ImageView is frame 5 which you can see by looking at the Image of the ScreenView. We also colored each textview frame.
Once you've added your FrameLayout code, you then add your TextViews to the same layout file. TextViews are commonly coded in the layout file as well as ImageView.
Text views can be used to add many things to your screen view; such as; adding text, or buttons, or to add a background color to your screen view, or as we have done in this Frame Tutorial; to add several frame squares with color.

We used various sizes for the 'TextView' colored frames. We coded each frame square differently so that each square can be seen separate from the previous one. To do this, we used the width and height attributes.
example: android:layout_width="765dp", android:layout_height="665dp"
THE CODE FOR THE IMAGEVIEW
We added an image to the view as well, to show that it also layers itself over the previously coded frame square. We placed the image to the right side of the screen view, using the android:layout_gravity="right" code. You can also use: left, top, bottom attributes for the gravity coding.
All images are placed in the res/drawable-hdpi folder, you don't need to code the .png, because it is in the drawable folder the android system knows it is an image.
android:src="@drawable/nameofimage".
THE CODE FOR THE APP ICON
Coding for the App icon was placed in the manifest file as shown in this image, and coded as 'android:icon="@drawable/framelayouticon"

The App icon image is placed in the drawable-hdpi folder; at res/drawable-hdpi". for this AppProject "Frame Tutorial' , just browse to:
AppProjects/FrameTutorial/Res/drawable-hdpi, in your files hierachy in the AIDE coding editor.
To add text next to the Apps Icon at top of screen display, you use the code for: label
To code the label we use: android:label="@string/app_name", which is coded in the manifest file, in the application code. The actual text you use is placed in the strings.xml file, which is at res/values/strings.xml, and is coded as shown in this image. For this app our label text reads: Frame Tutorial

Coding Tips - FYI
Frame Tutorial Layout
By default the textviews are placed on top of each other in the left top corner of the screen display.We wanted to be able to see each frame so we coded them all with different colors and different widths and heights.
Because they align at left/top on the screen, we added a top margin to each so that we could see the text we added to each textview frame: frame1, frame2, frame3...... If we had not added the top margin to each 'TextView', each textview frame would position atop the previous one, and therefore, we would not be able to view the text from each one.
For our 'ImageView', we placed it to the right side of the screen view, by using the 'android:layout_gravity="right" code. We also coded the same image as the App Icon. The app icon is resized from the larger image to make it a small image icon for your app.
The app icon is coded in the manifest.xml file and the image for the ImageView is coded in the main.xml layout file. Even though they are coded in different pages of the app, you need only place the one image into the res/drawable-hdpi folder. The android system knows to select the image for both coded pages.
A frame layout can be used for placing various text views or image views over each other, or just one textview or imageview for a single view. For example: You can add a photo by adding it to the ImageView and then place text over the photo by using a TextView.
Additional reading and all available attributes for the 'Frame Tutorial" layout code class can be seen at Android Developer Website for 'frame layout'
....frame layout attributes
JUST USE YOUR MOUSE to copy the code for this app 'Frame Tutorial ' Layout View tablet tutorial; and paste it into your layout file: main.xml
Also, code your manifest file to include the app icon name as shown in the image/example code on this page, and code your strings.xml file to say 'Frame Tutorial',and Frame1, Frame2, Frame3....for each TextView's text; and finally,
SAVE, the image shown in the Example Code to your tablet, then copy and paste the image into your AppProjects/Frametutorial App at res/drawable-hdpi folder.
TO COMPILE AND RUN YOUR APP:
App Name is 'Frame Tutorial' - located at AppProjects/FrameTutorial in AIDE, open the AIDE app, then open App Projects, THEN select the 'FrameTutorial', app from your files hierachy; then click on a file from the app, like strings.xml Make sure at top of page, the app name 'FrameTutorial' is there next to AppProjects like so: AppProjects/FrameTutorial, then you know you have the proper App. Once a file is in the editor, you can save it, then RUN your APP.
Make sure you SAVED EACH PAGE, before you RUN your code. SAVE, RUN, INSTALL, OPEN, your Frame Layout App. Once it has been installed on your tablet, you can open it Simply by Clicking on the App Icon, FRAME LAYOUT, from the apps directory on your tablet. Just look for the Frame Tutorial Layout icon, as shown in this tutorial.
If you make further changes to this Japanese App, you need to SAVE, RUN, UPDATE, INSTALL, OPEN the app.
This free script provided by
JavaScript
Kit
AIDE for creating Android Apps on your tablet or cell phone(android).
Free and Paid.
GoTo Aide
ANDROID STUDIO - for creating Android Apps on your desktop computer.
Free to Install and Use
Learn more - Android Studio
The Java XML files we code(example codes) and the Android Apps we create in our Free Tutorials are compatible with Android Studio and AIDE. Just choose Java XML as your Programming Language.
You May Like:
Make Sushi Rolls ProTipsPhotography Shoot Like A Pro with Your Point & Shoot Camera